
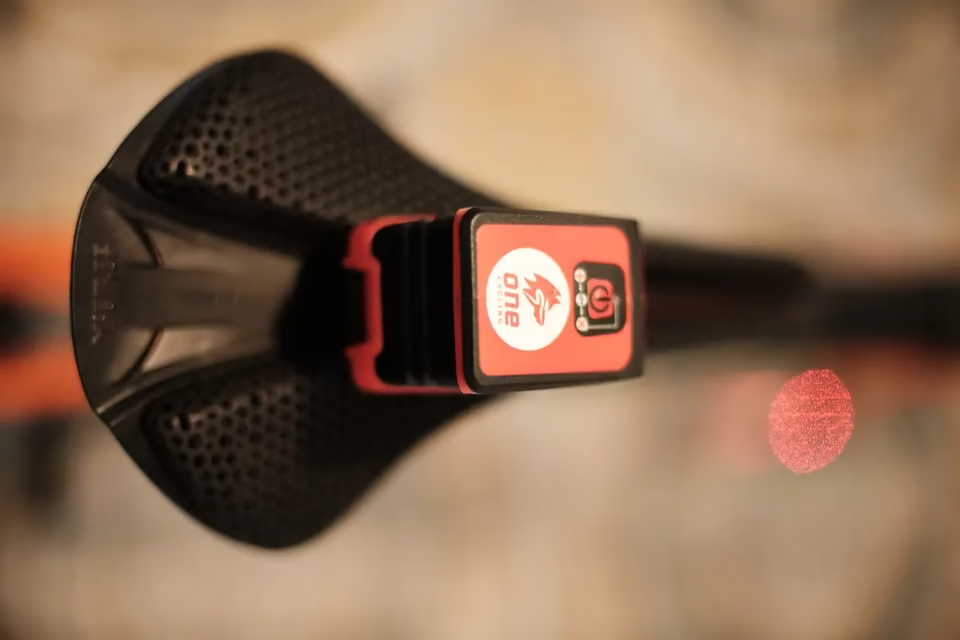
Saddle height measured with a laser guide in the laboratory

Summary

Saddle height

Free calculator · Position on the bike

Saddle height from the LeMond and Hamley formulas using your inseam, with the real margin of each one and the range to search within.

What you need
Your inseam measurement, barefoot and with a book against the wall. Nothing else: neither knee angle nor crank length enters these formulas.
What it gives you

The height according to LeMond and to Hamley, each with its real margin of error.

The range worth searching within, instead of a single number.

Where to start moving and by how much, so you never change two things at once.

What it does not do

No formula knows your femur-to-tibia proportion, your hip mobility or your ankle range. What comes out is where to start looking; the millimetre comes out while pedalling.

5.0 on Google from 60 public reviews, verifiable on the laboratory listing.
All calculators

Free tool

Saddle height calculator

Measure your inseam and get what the two classic formulas say, converted to the same reference so they can be compared. The result is not a figure: it is the range to search within while pedalling, which is a more honest and more useful answer.

It runs in your browser. Nothing is sent, nothing is stored and no sign-up is needed. If you use the buttons below the calculator, the message is written here and opens in your own app: you decide whether to send it.

Calculator

Your measurements

Barefoot, back against the wall, with a book pulled up until it presses the way the saddle does. Wear thin clothing without a cycling pad. Measure three times and keep the median.

It is stamped on the inner face of the crank arm, near the pedal.

To see how far you are from the range, and which way to move.

Range to search within · bottom bracket centre to the top of the saddle

What each method says

Result of each saddle height formula
MethodMeasured fromResultBB → saddle

The two formulas agree at around 84 cm of inseam and separate towards the extremes. That discrepancy is not an error: it is the margin within which you have to search.

How to move from here

  1. Change 2 to 3 mm at a time. Never whole centimetres at once.
  2. Ride two or three sessions before the next adjustment: the body needs time to tell “different” from “worse”.
  3. Record every position with a photo and the tape measure, so you can go back.
  4. If pain appears, return to the last height that felt fine.
  5. Measure again if you change shoes, cleats, pedals or saddle: the effective height moves.

Take the result with you

Send us this calculation and we will tell you what to do with it.

The button writes the message for you: what you entered, what came out and the name of the tool. It opens in your own app, already written, and you decide whether to send it. Nothing leaves this page until you do.

Your message opens ready to edit. Nothing is sent automatically.

Method and sources

References · 3 primary sourcesView the full citationsBini et al. 2011 · Ferrer-Roca et al. 2012 · Silberman et al. 2005

Primary sources and position statements the method on this page relies on.

  1. Bini, R., Hume, P. A. and Croft, J. L. (2011). Effects of bicycle saddle height on knee injury risk and cycling performance. Sports Medicine.
  2. Ferrer-Roca, V., Roig, A., Galilea, P. and García-López, J. (2012). Influence of saddle height on lower limb kinematics in well-trained cyclists. Journal of Strength and Conditioning Research.
  3. Silberman, M. R., Webner, D., Collina, S. and Shiple, B. J. (2005). Road bicycle fit. Clinical Journal of Sport Medicine.
Both reference formulas are calculated and converted to the same measurement — from the centre of the bottom bracket to the top of the saddle, along the seat tube — so they can be compared:

  • LeMond: inseam × 0.883.
  • Hamley: inseam × 1.09, measured from the pedal at bottom dead centre. To bring it to the same reference as the previous one, the crank length is subtracted.

The range shown runs from the lower to the higher of the two, widened by ±5 mm. That is not imprecision in the tool: it is how far two formulas and a tolerance reach. We do not know how often someone’s height falls inside that band — no validation has measured it — so treat it as the place to start looking. Only riding confirms it.

Where it stops working

  • No formula sees your proportions. Two cyclists with the same inseam can have femur and tibia distributed differently, and that changes the knee angle at the same saddle height.
  • Equipment counts. Sole thickness, cleat, pedal type and saddle sag move the effective height by several millimetres.
  • The good criterion is dynamic. The real reference is a knee flexion of 30 to 40° at bottom dead centre, measuredwhile pedalling. Static measurement underestimates that angle systematically, so a position that looks correct with the rider still can be too high.
  • Height does not adjust in isolation. Moving the saddle back 10 mm lengthens the maximum saddle-to-pedal distance by about 1 mm: it is trigonometry, the saddle moves horizontally and extension grows little. It sounds like nothing, but it pulls in the same direction as height, and changing one variable without looking at the other is the most common reason a “setback only” adjustment ends up hurting two weeks later.
Saddle height measured with a laser guide in the laboratory

When the formula is no longer enough

The formula gives the range. The millimetre comes from pedalling.

No formula knows your femur-to-tibia proportion, your hip mobility or your ankle range. On the GURU simulator the height moves millimetre by millimetre while you pedal under load, comparing pelvic stability between positions in seconds.

See BIKEFIT 3D
ONEPERFORMANCE FINDER
Your next step starts here